Senile Texas Aggie - comic relief for the rest of you

farmerjan

Herd Master
Joined
Aug 16, 2016
Messages
11,494
Reaction score
45,321
Points
758
Location
Shenandoah Valley Virginia
One other thing, on the cheaper products.... besides what @Bruce has said..... increased number of people in the world means we need increases in jobs.....so the "cheap use it up and buy another" is providing jobs for more and more people....
so where do you start drawing the line.... and what do we do with all the throw out stuff now, as it piles up and polutes our environment.
I had to replace 2 valves for the washing machine here, because they no longer make the small washers that go in the old one so that I could just fix it... So spent about $20 bucks for something that should have only cost a couple dollars to fix... No one wants to fix stuff nowadays....and companies cannot keep parts in for something that will only go bad once in 20-30 years.....
But the costs down the road to the destruction of the environment.... with just the waste of thrown out stuff.... will boggle your mind.

And we evolve.... just as we went from planting sticks, to horse power to internal combustion machines.... it is not all bad... but this is a finite world.... and we are going to have to limit our population or we will destroy it ....... one way or another.
 

Senile_Texas_Aggie

Herd Master
Joined
Jun 3, 2018
Messages
1,870
Reaction score
5,466
Points
343
Location
western Arkansas
All,

I just watched an interesting YouTube video on Regenerative Farming titled "Can Regenerative Agriculture Reverse Climate Change?". Do any of you have any knowledge about this one way or the other? It sounds like a wonderful way for our agriculture sector to grow our food.

Also, after I read up on the farm commodity price parity that Miss Farmerjan mentioned earlier on a post here recently, I was wondering how it differed from what we have currently which seems to favor big farms and disfavor small farms. Miss Farmerjan, if you are reading this, I don't expect to answer, as you are currently up to your ears in chickens, hay, planting wheat, and getting PT. But to anyone else reading this, where can I learn more about the differences between the former policy of price parity, which benefited every farmer, and the current policies, which benefit the big farmers over the small ones?

Also, Fed-Ex just delivered the starter for the Gator and the Geo-Cell driveway stabilizer, so I hope to get the starter replaced and the Geo-Cell installed tomorrow or maybe later.

Senile Texas Aggie


Senile_Texas_Aggie

Herd Master
Joined
Jun 3, 2018
Messages
1,870
Reaction score
5,466
Points
343
Location
western Arkansas
All,

Replacing the John Deere Gator 825i UTV starter

As I mentioned in an earlier post, I received a new starter for the Gator. Friday afternoon I decided to start the replacement process for the starter. So out to the shop I went to get started. Gathering up all of the tools I figured I would need, I then got started.

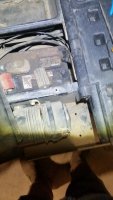
Step 1: disconnect the ground cable on the battery: 20201029_134839_disconnect_battery.jpg

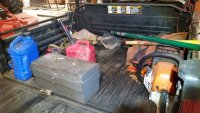
Step 2: empty out the cargo bed: 20201029_134909_empty_cargo_bed.jpg

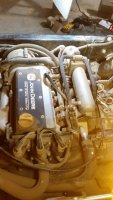
Step 3: look for the starter. Top of engine: 20201031_095751_before_disassembly.jpg
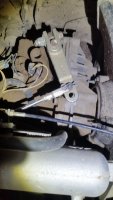
Top of transaxle: 20201029_140730_where_is_starter.jpg
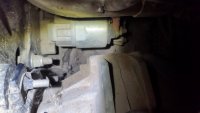
There it is!: 20201029_140655_starter_closeup.jpg

Step 4: Watch YouTube videos to see how to get the starter out. The last picture makes it appear that removing the starter will be really easy, but it is not. The opening is much narrower than it appears. I wanted to see if I would need to remove the skid plates from the bottom of the engine, or take out the starter through the side, where I could see it. I am glad I watched the videos, as I learned that I would need to remove the starter from the side, and that to access the bolts that hold the starter to the engine, I would need to remove the shroud that goes around the belt drive. Given how much work I would need to do, I decided to quit for the day and start again tomorrow. So Friday afternoon was the first day.

Saturday

Saturday morning is when I started removing everything.
Step 5: remove the shroud around the belt that goes from the engine to the transaxle: 20201031_124523_removal_of_belt_shroud.jpg

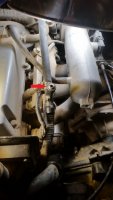
Step 6: remove the water manifold from around the air intake manifold. Please note the red arrow, denoting an air outlet port that will become important later: 20201031_115738_removal_of_hose.jpg

By this point it's time for lunch and my back is really hurting from bending over so much, so I break for lunch.

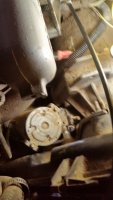
Step 7: Remove the starter. This step alone took me about 2 hours, primarily from trying to maneuver the starter out of the hole where it normally stays, around the air intake manifold, and out: 20201031_134713_removing_starter.jpg

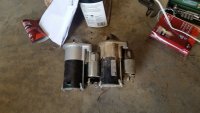
The old and new starters: 20201031_144142_new_and_old_starters.jpg

By the time I got the old starter out, my back was REALLY hurting, so I quit for the day. So the morning and the afternoon were the second day.

Sunday

After a good night's rest, I tackled the reassembly.

Step 8: Install the new starter. I probably worked around 30 minutes trying to maneuver the starter past the intake manifold without success, to the point where my fingers became fatigued where I lost my grip on the starter and dropped it. When I did so, the starter fell through the opening and into where I was trying put it! How did that happen? Oh, well, I didn't complain. I then got the starter bolted back onto the engine.

Step 9: Install the belt shroud. I reinstalled the shroud for the belt.

Step 10: Install the water manifold around the air intake manifold, along with all of the hoses.

Step 11: check coolant level. Looks OK.

Step 12: Reconnect the ground cable and trying the new starter. Success -- it started right up! I went to the house to see if my Beautiful Gal wanted to go for a ride. She did, but needed to change clothes. While I was waiting on her, the Gator overheated! I turned off the engine and let it cool before opening the radiator cap. Coolant sprays out. I refill and start engine again. It starts to overheat again. Then I remember in one of the YouTube videos that the presenter said that it was important to ensure that the water manifold had water in it where it come out the air relief port. So I removed the cap in that port and filled the radiator to the point where water came out that port, then reinserted the cap, filled the radiator, and started the engine again. The engine ran just fine! Finally, success! And the morning and the afternoon was the third day.

So the Senile Texas Aggie rested in the night after the third day, and he blessed the work that he had done.

More seriously, I am glad to get the Gator repaired. I felt and still feel somewhat ashamed that it took me 2 1/2 days to do what Miss @farmerjan, Mr. @Bruce, Miss @Baymule, Mr. @Bruce, or Miss @rachels.haven would have accomplished in less than half a day. But at least I got it done and we no longer need worry that the Gator will leave us stranded somewhere because it won't start.

Senile Texas Aggie
 

Senile_Texas_Aggie

Herd Master
Joined
Jun 3, 2018
Messages
1,870
Reaction score
5,466
Points
343
Location
western Arkansas
All,

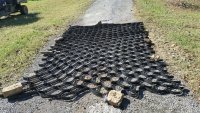
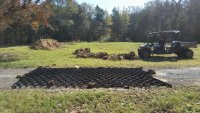
After repairing the Gator a couple of days earlier, yesterday I decided to install the GeoCell on the driveway that I had ordered the same time I ordered the starter for the Gator. I had decided to install the GeoCell after what happened earlier this spring. I had laid down some slag on the driveway and a couple of weeks later a big rain caused the creek to overflow and wash away most of the slag out into the pasture. Then after seeing the YouTube video described below, I decided to order the GeoCell and install it. I mistakenly thought that the GeoCell came with spikes to secure it in place, but apparently I needed to order the spikes separately. I decided to use landscape pins instead. Unfortunately, they were not stiff enough to go into the ground deep enough with the gravel and slag already there. So I decided to put down big rocks simply to hold the GeoCell in place while I filled the cells with the slag. Here are two pictures of the first GeoCell grid before I put the slag into it.

Looking up the driveway toward the culvert: 20201103_110603.jpg

Looking across the driveway: 20201103_110623.jpg

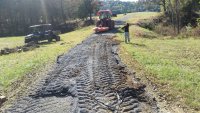
After filling in the one GeoCell grid, we decided we needed to put down a couple more of them, as there were still unprotected parts of the driveway on either side. (The two pictures above is only 1 GeoCell grid and I had ordered a total of 5.) So I did that and then filled in the GeoCell with the remainder of the slag and then with a bit of crushed concrete. Here are the results: 20201103_130105.jpg We will need to wait for a good rain before we can tell how well the GeoCell has worked. But the results did not turn out as well as Colorado Mountain Living's results did!

Finally, the sunrise this morning over the Flood mountain range: 20201104_062956.jpg

Senile Texas Aggie

Here is where I first learned of the GeoCell, namely from the YouTube channel Colorado Mountain Living:


Bruce

Herd Master
Joined
Feb 4, 2016
Messages
17,451
Reaction score
45,860
Points
783
Location
NW Vermont
When I did so, the starter fell through the opening and into where I was trying put it!
Score one for STA's luck turning to the positive!!!!

I felt and still feel somewhat ashamed that it took me 2 1/2 days to do what Miss @farmerjan, Mr. @Bruce, Miss @Baymule, or Miss @rachels.haven would have accomplished in less than half a day.
Not hardly!!! I suspect I'd be happy if it ONLY took me 2.5 days!
 

Senile_Texas_Aggie

Herd Master
Joined
Jun 3, 2018
Messages
1,870
Reaction score
5,466
Points
343
Location
western Arkansas
All,

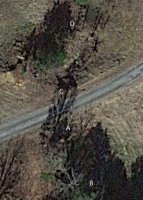
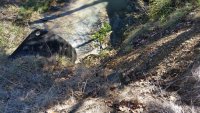
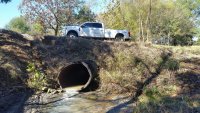
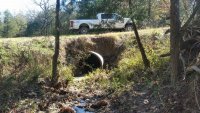
I need some ideas on how to stop some erosion and stabilize a bank next to the driveway. The bank that goes over the culvert upon which the driveway is built drops off quite steeply down to the creek on either side of the driveway. Here are some pictures to give you an idea. The first picture gives you an idea of from where the remaining pictures were taken.

Driveway, culvert, and creek: 20201106_092628_driveway_culvert.jpg

Point A, looking to the southeast down from atop the driveway down the bank into the creek: 20201030_141819_culvert_looking_south_from_above.jpg

Point B, looking from the creek bottom back up to point A: 20201030_141945_south_side_of_culvert_looking_up.jpg

Point C, looking north from the driveway down into the creek: 20201030_142208_culvert_looking_north_from_above.jpg

Point D, beside the creek looking back up to point C: 20201030_142358_north_side_of_culvert_looking_up.jpg

Now that you have an idea of what I am facing, I would like to get some ideas. Should I even do anything at all? After all, I don't know that the bank has eroded any more for the time we have been here. I just don't like that it is a bit narrow at the top. If something should be done, I can think of several possibilities:
(A) Use the Miss @Baymule approach of concrete bags piled on top of one another. To ensure that they remain stable, I could drive rebar into multiple bags. I have plenty of dirt to use as backfill.
(B) Use concrete blocks and build a wall. Use dirt as backfill.
(C) Use riprap on the bank and netting to hold the riprap in place.
(D) Use concrete forms and pour concrete walls on the sides. Use dirt as backfill.
(E) Other?

Thanks for whatever suggestions you folks can provide.

Senile Texas Aggie
 
Top