Bruce's Journal

Bruce

Herd Master
Joined
Feb 4, 2016
Messages
17,451
Reaction score
45,863
Points
783
Location
NW Vermont
Thanks for the tips guys. Whereas I was originally going to start in the area where I have the plywood down since I figured I could make a deeper hole for the fish, I don't think any are alive anymore. So I'm going to start in the SW corner where I basically have a "road" if I cut into the west side a bit with the left side of the bucket. Practice on the shallow end from a very gentle slope.

As to how the pond was built, the deeper (north) end follows the contour of the land, it slopes down both west and north. It starts rising on the west to more visible ledge about 100' from that side of the pond but continues down going north. The berm that makes those sides of the pond are somewhat steep on the outside. NOT thinking of running the tractor up those backward hoping to get the bucket a couple of feet into the pond (horizontally), MAYBE. My GUESS is they dug dirt from what is the "deeper" part and made the berm. No idea if there is any rock or other structural "stuff" in the berms. Whether they went all the way down to ledge everywhere in the pond I have no idea. What I do know is there is decades of dirt/silt/whatever on the bottom now.
 

Latestarter

Novice; "Practicing" Animal Husbandry
Golden Herd Member
Joined
Dec 31, 2014
Messages
11,384
Reaction score
17,481
Points
623
Location
NE Texas
OK... just a thought... What about making a break in the pond berm and draining it, then doing the bottom work, rebuild the berm, let the fall rains and winter snow melt re-fill it for spring? :hu Or maybe dig a trench around the side of the berm to drain it so the berm integrity isn't disturbed... Then you could bury a large sized drain pipe to the center of the deep end with a valve so next time you won't have to dig to drain it?
 

greybeard

Herd Master
Joined
Oct 23, 2011
Messages
5,940
Reaction score
10,805
Points
553
Location
East Texas
I didn't know he intentionally drained it...thought it was from lack of rain.
 

Latestarter

Novice; "Practicing" Animal Husbandry
Golden Herd Member
Joined
Dec 31, 2014
Messages
11,384
Reaction score
17,481
Points
623
Location
NE Texas
No... I was suggesting the possibility of doing so...
 

greybeard

Herd Master
Joined
Oct 23, 2011
Messages
5,940
Reaction score
10,805
Points
553
Location
East Texas
Ok.
There is more to installing a drain or overflow pipe than digging a trench, dropping in the pipe and back filling it. If it were a square or rectangle shaped pipe, it's relatively easy but round pipes present unique backfill problems due the curvature on the bottom 1/2 of the pipe and as a result, they often fail to seal and leak. It's difficult to get dirt to even go back under the curvature, much less pack down against the pipe.
Most overflow or control pipes don't use an anti seep collar, but they should. I don't have one on the 24" culvert pipe I showed a couple months ago, but I should have used one on it as well. It's just a piece of steel that encircles and sticks out from the pipe 360° and digs into the soil in the bottom of the trench. You may still have a void nest to the bottom curvature, but the soil particles quickly gets compacted next to the seep collar and seals off.
The top part shows a drain/overflow pipe without an anti seep collar, then one with an anti seep collar from a 'pond end' view.
The bottom part shows a pipe with anti seep collar as it would be seen from on top of the dam.
seep.jpg

You can see a anti seep collar installed here:
http://www.soilmovers.com/central-texas-fishing-lake-infrastructure/


Most farm ponds silt, some more than others. Ponds with lots of deciduous trees or even pine trees in it's water shed are bad about filling in due to the leaves settling and turning to silt, and of course, soil gets washed in no matter what. Mowing the watershed contributes significantly as well, as the first big rain washes the cuttings into the pond body. Everything sinks to the bottom, as well as other biological crap and slowly builds up down there. The process for most farm ponds takes 20-30 years to really begin to show up tho.
 
Last edited:

Bruce

Herd Master
Joined
Feb 4, 2016
Messages
17,451
Reaction score
45,863
Points
783
Location
NW Vermont
The anti seep collar is to keep the fill from washing out?

This pond doesn't even have an overflow pipe but I don't think I'm up to remedying that, afraid the berm wouldn't hold when I rebuild it since I have no idea what I'm doing. The natural overflow area is in the NW corner of the pond which I can't get to with the tractor with respect to dredging, the deeper part I'm making is on the NE corner and side. I guess if I worked up to it the next time there is a drought, I could dig out the berm where the overflow happens and try to dig out the pond. But it would have to be really dry to get the tractor in and not stuck in the muck.

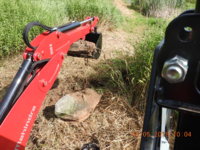
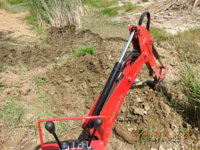
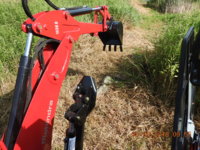
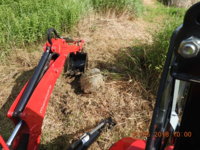
I started on the SW side, dug out what I could reach from the side as I went north but the ground got high on the west side, wasn't comfortable running the tractor on a side slope. I had to go back through the waste and it is soft, glad I didn't get stuck. I'm not able to make a flat "road" with the bucket since the tractor is parallel to the hill. Tried some with the backhoe which kinda worked but it is mushy soft where I had gone before and the front wheels lost traction in the muck (R4s vs R1s?). I thought better of continuing but might go back after it has a chance to dry out more. I have pictures of that work. First the rocks that were in the path.
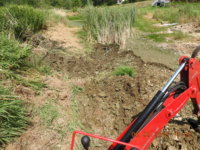
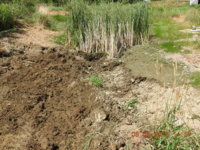
DSCN1136.JPG DSCN1137.JPG DSCN1138.JPG DSCN1139.JPG

Dug out to where you can see I stopped at the cattails. Probably should have started backwards and moved the waste as I went, about trapped myself going forward since I had the hoe angled toward the pond for max reach and had to dump on my path. Live and learn. The last picture shows when I quit working on that area, you can see it is pretty chewed up. Not obvious but there is a ridge between the "path" and where I dug the pond. The PLAN was that area was going to be stable enough to make the "road" but not the case.

DSCN1140.JPG DSCN1141.JPG

After I stopped there I went to where the plywood was shown before. Have to get pictures tomorrow. I got a bit nervous with being too "uphill" with the tractor per @greybeard's concerns so I angled it with only the left side backhoe brace on the more southerly piece of plywood. That meant I ended up dumping the waste mostly on the other piece. Being sludgy it slumped, hopefully whatever water is in it will seep back to the pond without too much of the "dirt/clay/mud". I dug a hole, hard to see exactly how deep where given all the muck. The part toward the center of the pond broke through and water came in to fill my hole way before I was expecting or wanting it to. I saw a lot of dead small fish on the current but also a few clinging to life in the shallow water and fighting the "current". Hopefully they will get to the deeper spot and the silt will settle so they can breath.

I'm noticing I might have a problem, I can't connect the north east and south west sides with the tractor so in a drought I would end up with 2 deeper areas and if one started to go dry, the fish couldn't get to the other one. Might have to get out the manual shovel. That stuff is heavy :(

Good thing I quit when I did. When I got back in the tractor's operator station I noticed the fuel symbol blinking. That means close to 7.7 gallons were used for 10+ hours on the engine. Over 6.5 of that was today and mostly at 2,000 RPM. Engine had 1.2 hours on it when the tractor arrived. Put my 5 gallons of diesel in, have to get another 5 tomorrow.

I have to say having the fill cap right in the middle of the engine cowl and a foot or so from the dash is not real convenient for use with 5 gallon cans. I guess they expect people to have a large tank and electric pump? I have ordered a 5 gallon can that has a short hose connected near the bottom and a trigger on top to let the fuel out. As noted by a commenter on Amazon, you have to release the trigger before the tank is full since there is fuel in the hose that still has to drain. I saw it first at Aubuchon Hardware but they wanted $61 which seemed a LOT to pay for a 5 gallon can. $44 on Amazon.
 

mystang89

True BYH Addict
Joined
Jun 23, 2012
Messages
1,051
Reaction score
1,996
Points
298
Location
Charlestown IN
You should have just picked those tiny pebbles up with you hands instead of using that backhoe :p lol

I agree about the location of the gas cap. Holding a 5 gal container gets old. I normally try to situate the can in my knee and hold it steady for the 5 minutes it takes to empty it. Fortunately I don't go through gas that often.
 

Baymule

Herd Master
Joined
Aug 22, 2010
Messages
35,800
Reaction score
110,779
Points
893
Location
East Texas
We started out with a 5 gallon plastic can. I found a 500 gallon tank on Craigslist and it is a whole lot easier. We have a diesel truck, Kawasaki mule and the tractor.

I wouldn't break the dam. If you need the rest of the water out, what about renting a pump? If you are trying to save the fish, could you put them in a water tank with something to aerate the water?
 

Bruce

Herd Master
Joined
Feb 4, 2016
Messages
17,451
Reaction score
45,863
Points
783
Location
NW Vermont
I'll take pictures in the morning. There is hardly any water left. WAY worse than the last drought. But what is under the water is slick soggy airy muck. I did hit ledge everywhere I dug. Not hard to know it is there when you are curling the bucket and the rear of the tractor starts to lift. I'm learning the down, curl, up a bit while curling, pulling in, up a bit while pulling in (because of the ledge) thing. Still have to think about the controls even after 6 hours of using them today.

I do have an unused stock tank. Not sure how I could catch the fish though. Didn't see them this evening and unless they wanted to be right next to the plywood, couldn't reach them anyway.
 
Top